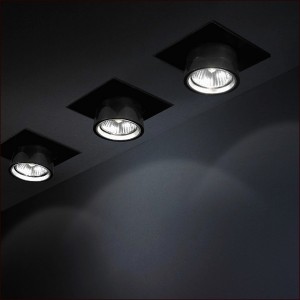
Recessed lighting (AKA "can lights") gives any room a modern, stylish look. Unfortunately though, a retrofit installation for those of us without attic access can also get pretty expensive if you hire someone to do the work for you.
The housings and trim themselves aren't that expensive -- I picked up some 4" Halo retrofit can lights for about $17 each from Lowe's and trim for about $20 each at Home Depot. The labor on the other hand, was ridiculously expensive. The cheapest quote I got was $60 per light -- and this wasn't even from a licensed electrician, just a local handyman I happened to know. So installing the 12 lights I bought would have set me back a good $720 just for labor. And to add insult to injury, the $60 per light quote was just to install the lights and didn't include patching the ceiling.
Now I'm a cheap bastard so there's no way I'm going to pay someone to do something I can most likely tackle myself. Before I started though, I wanted to make sure I wasn't getting in over my head and end up destroying my place so I Googled for some DIYs on how to install retrofit recessed lighting. Looked simple enough, but the only problem was almost all the guides/walkthroughs did the retrofit with attic access. Here's a link to one of the better ones I found that show you how to do it without attic access.
Here's a walkthrough of how I installed mine. Slightly different approach than the link above so hopefully it'll help someone else save a few bucks.
Note: Before proceeding, check with your city/county to see whether you need to obtain a permit or not. More info here.
Materials Needed
Retrofit Recessed Light Housings
I went with 4 inch housings (Halo H99RT) because those were the smallest I could find that would fit a CFL (Compact Fluorescent Lamp). A smaller 3 inch halogen housing would definitely look better but I wanted something a little more practical and daily usable. Either way, make sure you get the retrofit and not the new construction housings.

")
Light Bulbs
As much as I would have liked to have gone with halogen bulbs and made my place look like an art gallery,
I ended up going with CFLs because of the impracticality of halogens (heat, energy consumption etc).
I still wanted to at least somewhat achieve that effect though, so I
shopped around for dimmable CFLs that would fit in a 4 inch recessed light housing.
Finally ended up going with EcoSmart 14W (60W equivalent, part number ES5M814DIM2) dimmable CFLs from
Home Depot. The reviews for these bulbs aren't that great on the Home Depot site but
I've had them for about a year now and haven't had any issues with them.
They certainly don't dim as much as regular incandescent or halogen bulbs and you must
use a CFL dimmer with them, but other than that they've worked fine for me.
Lousy pics from my phone, but yes they do dim:


Recessed Lighting Trim
I went with a reflector trim because I wanted the light pattern to be slightly more focused (like a spotlight). Halo 999P is the part number.


Wire, Wire Connectors
Lots of it. I used the Southwire 100 ft. 12-2 Romex NM-B Wire (part number 28828223) from Home Depot because that's what the guy working there suggested. These wires are thick/firm enough that you don't need a wire fish to get them where you want them.


Wire Cutter/Stripper, Pliers


Utility Knife

Drill and Wood Boring Drill Bit
You'll inevitably need to drill through a ceiling joist at one point or another. The 3/4 inch Irwin Speedbor wood boring drill bit (part number 3041004) worked great for me.


Tape Measure, Ruler


Drywall Saw

Stud Finder
The cheap $20 Zircon e50 stud finder worked just fine.

Gypsum (Drywall) Panel, Spackling Compound, Drywall Screws
You'll need these to repair the numerous holes you're about to punch in your ceiling.


 Panel")
 Panel")
Knockdown Texture Spray (optional)
My ceiling has a knockdown texture. You won't need this if yours doesn't.

Ladder

Gloves and Safety Glasses
... if you're a sissy. j/k ;)


2026 © All Rights Reserved. Privacy Policy